Assign to a group

If a new student has joined, you can add that student to a group if you wish.


You can add a student to a group from several places
  • From the student's individual profile 
  • From the list of students on the ALL tab
  • From the list of students in GRADE tab.
  • From the list of students in GROUPS tab.

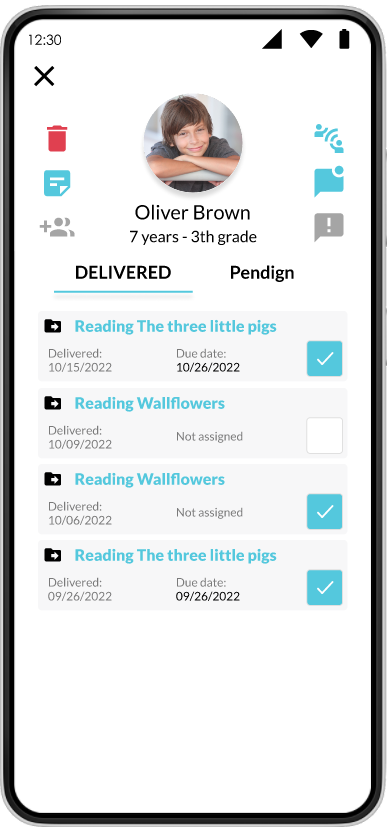
From individual profile

  1. Enter the individual profile of the student you want to group.


    image.png


  2. Tap UNGROUPED.png icon
    If the icon is displayed like this: grouped.png it means that the student already belongs to a group.
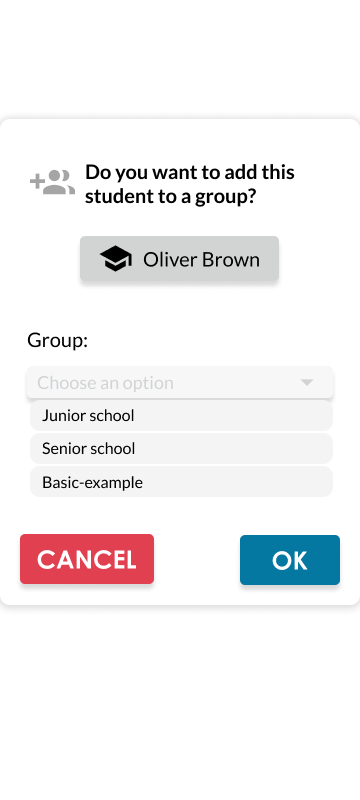
  3. If you tap  UNGROUPED.png , a pop-up screen will appear where you can select the group to which you want to assign the student.ADD GROUP.png
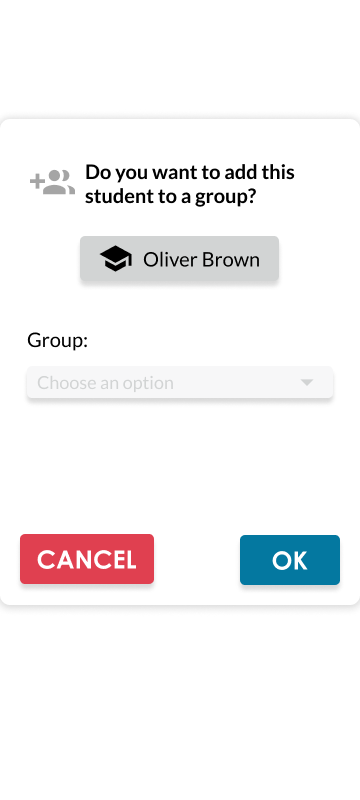
  4. When you tap on the bar, you will have a list of group options.


    dHAadd-group-2.png

  5. To finish adding the student: Tap  ok_button_group-created.png

From all tab 

  1. From the top menu, go to Students-menu-list.png
  2. The ALL option is the main option by default
    2ndbar.png
  3. Each student's individual profile will be on display.
  4. You should tap the icon UNGROUPED.png
    If the icon is displayed like this: grouped.png it means that the student already belongs to a group.
  5. If you tap UNGROUPED.png , a pop-up screen will appear where you can select the group to which you want to assign the student.ADD GROUP.png
  6. When you tap on the bar, you will have a list of group options.


    dHAadd-group-2.png

  7. To finish adding the student: Tap  ok_button_group-created.png

From school grade tab

  1. From the top menu, go to Students-menu-list.png
  2. Tap SCHOOL GRADE tab bar
    school-grade-bartab.png
  3. Tap the desired group name. A group of options will be displayed

    image.png

  4. Tap  lsit.png  from the icons displayed.
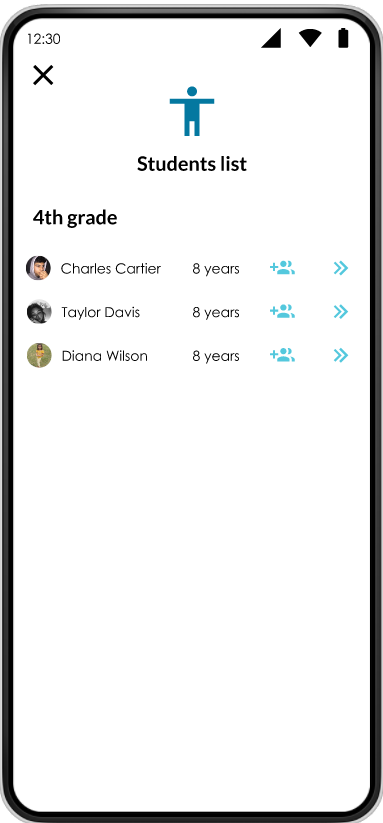
  5. The students list screen will show you.

    image.png

     
  6. Each student's individual profile will be on display. (If you want to go to the student's profile tap next sign.pngicon)
  7. You should tap on the icon UNGROUPED.png
    If the icon is displayed like this: grouped.png it means that the student already belongs to a group.
  8. If you tap  UNGROUPED.png , a pop-up screen will appear where you can select the group to which you want to assign the studentADD GROUP.png
  9. When you tap the bar, you will have a list of group options.


    dHAadd-group-2.png

  10. To finish adding the student: tap  ok_button_group-created.png


From groups tab 

  1. From the top menu, go to Students-menu-list.png
  2. Tap GROUPS tab bar
    groupstab.png
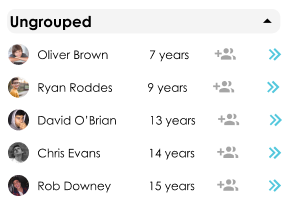
  3. Tap   Arrow drop down.png  of the group you wish to view.


    image.png


  4. Each student's individual profile will be on display. (If you want to go to the student's profile tap next sign.pngicon)
  5. You should tap the icon UNGROUPED.png
    If the icon is displayed like this: grouped.png it means that the student already belongs to a group.
  6. If you tap  UNGROUPED.png , a pop-up screen will appear where you can select the group to which you want to assign the student.ADD GROUP.png
  7. When you tap the bar, you will have a list of group options.


    dHAadd-group-2.png

  8. To finish adding the student: Tap  ok_button_group-created.png