
Assign to a group
If a new student has joined, you can add that student to a group if you wish.
You can add a student to a group from several places
- From the student's individual profile
- From the list of students on the ALL tab
- From the list of students in GRADE tab.
- From the list of students in GROUPS tab.
FROM INDIVIDUAL PROFILE
- Enter the individual profile of the student you want to group.
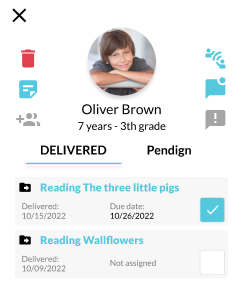
- Press

If the icon is displayed like this: it means that the student already belongs to a group.
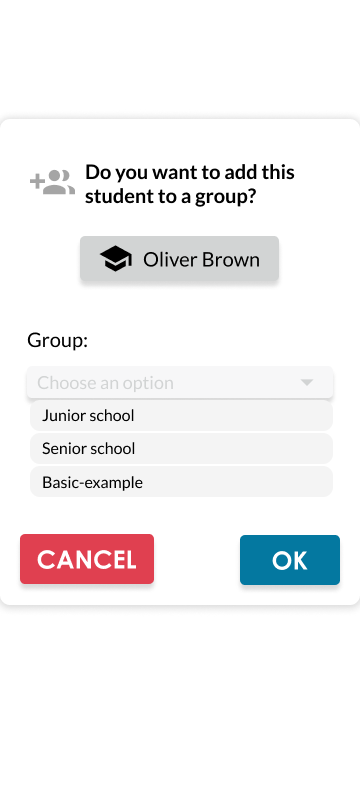
 - If you press , a pop-up screen will appear where you can select the group to which you want to assign the student.

- When you press on the bar, you will have a list of group options.

- To finish adding the student: pressing


FROM ALL TAB
- From the top menu, go to

- The ALL option is the main option by default

- Each student's individual profile will be on display.
- You should press on the icon
If the icon is displayed like this: it means that the student already belongs to a group. - If you press , a pop-up screen will appear where you can select the group to which you want to assign the student.
- When you press on the bar, you will have a list of group options.
- To finish adding the student: pressing

FROM SCHOOL GRADE TAB
- From the top menu, go to
- Press SCHOOL GRADE on the top tab

- Press on the desired group name. A group of options will be displayed

- Press
 from the icons displayed.
 - The students list screen will appear.

- Each student's individual profile will be on display. (If you want to go to the student's profile press on
 )
) - You should press on the icon
If the icon is displayed like this: it means that the student already belongs to a group. - If you press , a pop-up screen will appear where you can select the group to which you want to assign the
student.student - When you press on the bar, you will have a list of group options.
- To finish adding the student: pressing


FROM GROUPS TAB
- From the top menu, go to
- Press GROUPS on the top tab

- Press
 of the group you wish to view.
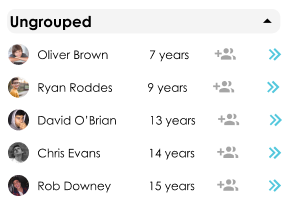
- Each student's individual profile will be on display. (If you want to go to the student's profile press on )
- You should press on the icon
If the icon is displayed like this: it means that the student already belongs to a group. - If you press , a pop-up screen will appear where you can select the group to which you want to assign the student.
- When you press on the bar, you will have a list of group options.
- To finish adding the student: pressing

