
Activity assignment
Assigning activities consists of letting the learner know what activity they are expected to perform, with instructions and a definition of the type of content to be delivered.
- Once you have uploaded the activity you want to assign (to upload your activity, see: Upload my content). Go to Activities

- Tap

- Once inside, select the folder that contains the activity you want to assign.
- Tap the activity you want to assign
- Two options appear
 . Tap
. Tap  icon.
icon. - On the pop-up screen, you will see the name of the activity you want to assign and the "Assign to" option.
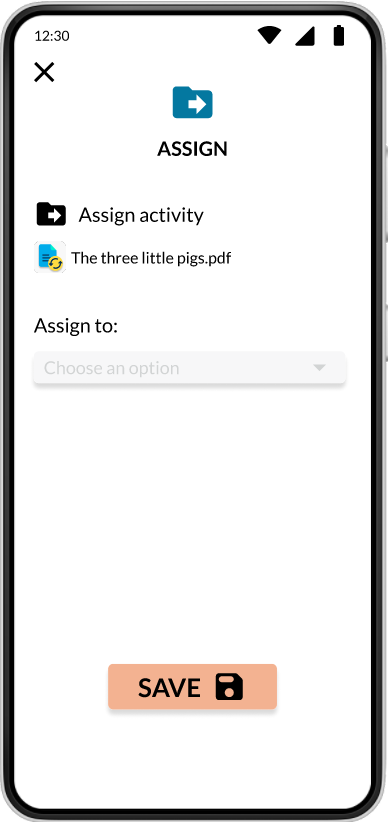
- Tap the options bar and select the type of assignment you want to make: individual, group or grade.
Individual
- The screen will change and the "Add Student" option will be added, tap

- On the pop-up screen you will see a list of students available for assignment . Tap
 next to the student name to add them to the activity assignment.
 - When you have selected all the students you want, tap
 to add them.
 - You will see the students you have selected for the activity.
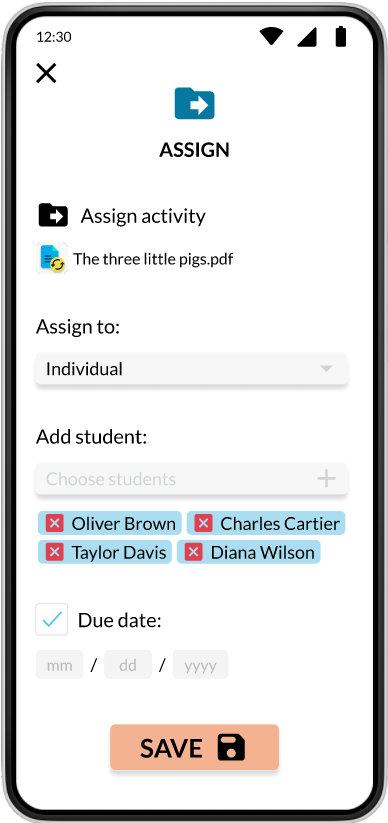
(If you want to remove any of them, just tap )
) - You will see the option to add a due date, if you want to activate it, tap

- Enter the date assigned for the submission of the Activity
 (activities will have a due date time of 23:59).
 - Tap
 to send the assignment with the entered data.
 - A pop-up screen will open with a summary of the activity assignment, where you can see the name of the activity, the students who were assigned and sent the assignment notification and the deadline for submitting the activity.
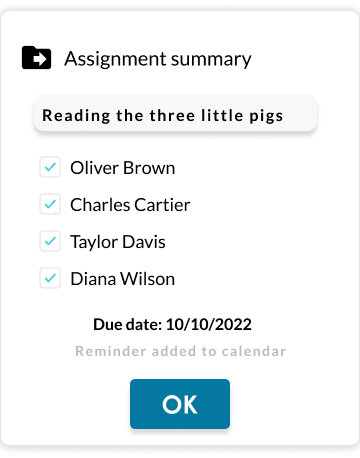
(A reminder of the activity deadline will be added automatically). - Tap to finish
Group
- If you choose to assign by groups, the screen changes and adds the option to choose from the groups you created.
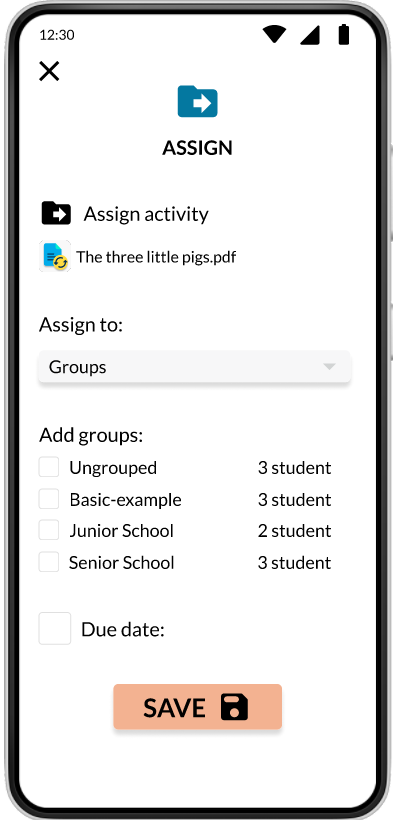
- Tap
 to add a group to the assignment
- You will see the option to add a due date, if you want to activate it, tap
- Enter the date assigned for the submission of the Activity (activities will have a due date time of 23:59).
- A pop-up screen will open with a summary of the activity assignment, where you can see the name of the activity, the group assigned and sent the assignment notification and the deadline for submitting the activity. (A reminder of the activity deadline will be added automatically).
- Tap to finish
Grade
- If you choose to assign by grade, the screen changes and adds the option to choose from the grades.
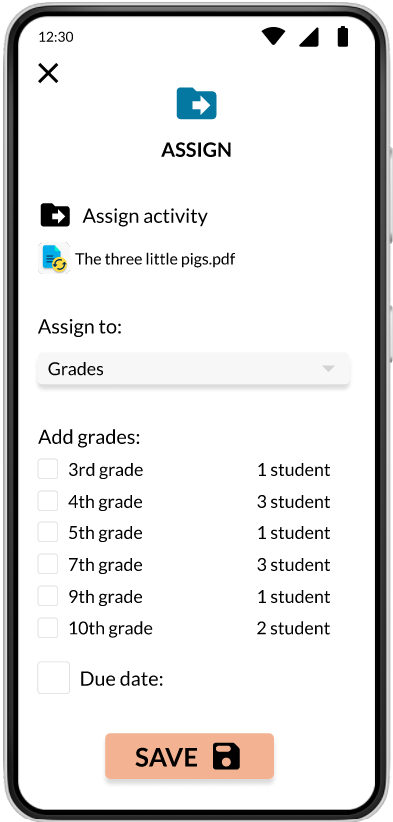
- Tap to add a gradeto the assignment.
- You will see the option to add a due date, if you want to activate it, tap
- Enter the date assigned for the submission of the Activity (activities will have a due date time of 23:59).
- A pop-up screen will open with a summary of the activity assignment, where you can see the name of the activity, the grade assigned and sent the assignment notification and the deadline for submitting the activity. (A reminder of the activity deadline will be added automatically).
- Tap to finish
- If you choose to assign by grade, the screen changes and adds the option to choose from the grades.
- If you choose to assign by groups, the screen changes and adds the option to choose from the groups you created.
- The screen will change and the "Add Student" option will be added, tap


