Interventionist
Letter order, is an application created with the purpose of providing the educational group Student-Interventionist-Parents, a tool that facilitates the process that takes place during the formative stage of students with Dyslexia.
- Get started:
- My profile
- Content
- Main functions
- Add student
- Create group
- Assign to a group
- Activity assignment
- Group conversation
- Notes
- Notice
- Meeting
- Student profile
- Organization
- Quick start
Get started:
Letter Order offers sections designed for information management, to start using the application we will know: "create account", login, "upload documents", and "my profile".
Create account
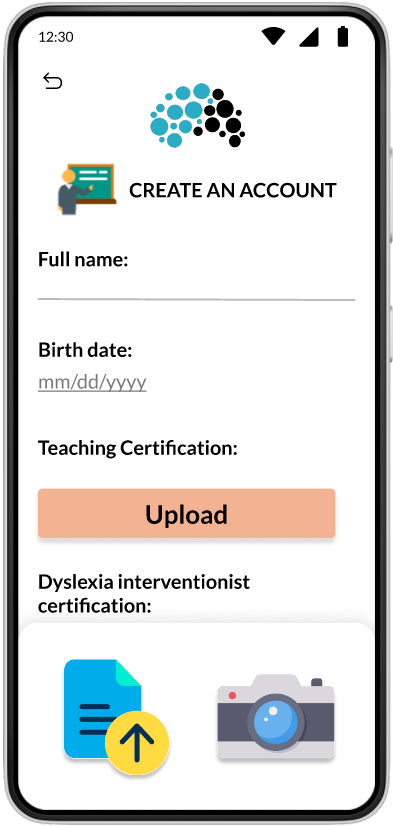
To start using Letter Order, you need to create an account, and to do so, you must first determine what type of user you will be. If you are in this section, it means that you are interested in creating an "interventionist" or "admin" account as mentioned on the main login page of the app.
How to create an account
After downloading and installing the app. When you open the app, you will see the option ![]() this will be your user type.
this will be your user type.
- Choose the user "admin"
- Tap

- You must fill your personal and teaching information.
- Full name
- Birth date
- You will need to upload documents certifying that you are qualified to teach and to be a dyslexia interventionist. Tap
 to load your documents.
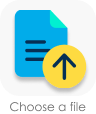
You can select them from your files in your device's file manager , or take a picture of your documents
  .
.
- Continue to fill out the information:
- Years of experience been interventionist
- Password
- Password confirmation
- Accept the terms for the creation of your account

- Tap the button
 , if all the data are correct your account creation as an interventionist will be accepted. The legend "Your account has been created" confirms that your account has been created, tap
and you will now be able to login.
Log in
Once you have created your account as an interventionist, we will log in with the email and password that we previously added when we created our account. If you do not have an account yet, create it.
Login
- Tap interventionist user

- Enter your previously registered email
 name-example@example.com
 - Enter the password you have created
 (write it down somewhere or save it in a password manager for your convenience).
 - Tap
 if you want your account to be remembered when you log into the application and be easily accessible.
 - Tap on
 .
.
Now you can start using your account.


Log out
- Tap on the top right icon with three vertical dots
 wich is next to the notifications icon
  .
. - A menu will be displayed, in which you must tap

- In the pop up you have to tap "Yes" if you want to continue or "Cancel" if don't.


Password recovery
If you have forgotten your password...
- Go to your login
- Tap

- On the screen that appears, enter your email address again.
- Tap

- A link to securely reset your password will be sent to your registered email address.
- Once your password has been reset, you will be able to login to your interventionist account.

My profile
In your profile you can find your information to display as an interventionist.
My profile
In your profile you can find your information to display as an interventionist.
To visit your profile you must tap on the top right icon with three vertical dots  wich is next to the notifications icon
  .
.
A menu will be displayed, in which you must tap ![]() .
.
Once there in your profile you will be able to find your information:
- Add or change your profile picture
- Tap on your profile picture

- Choose between taking a photo and uploading an image from your files.
- Once you have selected the image tap "Done" and your image will be uploaded to your profile.
- Tap on your profile picture

- Change your password
- Tap on the edit icon next to your email and password

- The new window will ask you to enter your current password, a new password and repeat the new password.
(If you need to change your email address you can contact us at support@letterorder.com) - Tap
 button. The legend "Your password has changed" confirms the change.
- Tap on the edit icon next to your email and password
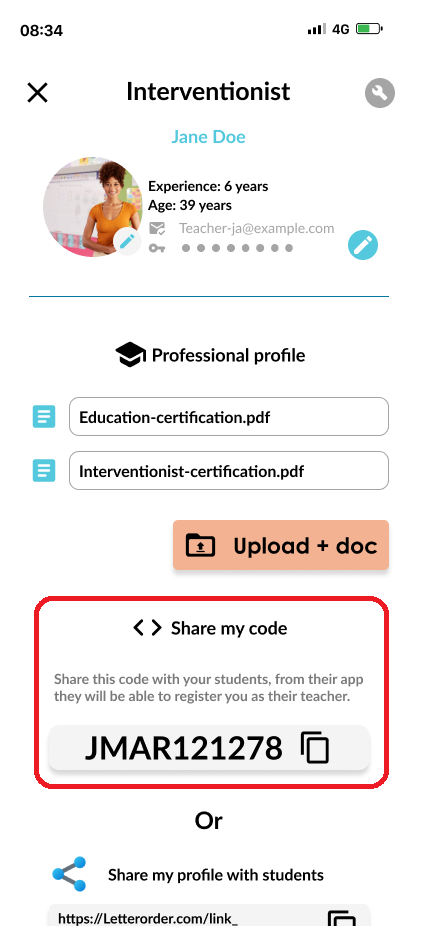
- Your teacher code: which you can share with your students so that they can add you as their new teacher.
Professional profile
Your professional profile: where you can upload or update your teaching, interventionist and education certificates, which will be shown to students and parents.
Upload doc
- Login to your profile as above.
- In the professional profile section tap
 button.
 - Select the option you want, take a picture or choose a file from your device .
- With your file uploaded, you will need to enter the name of the document, a description of the document (optional).
- Tap
 to save your uploading document.
 - Now the name of your document will be displayed on your professional profile.
Update doc
- If you wish to update your documents you must log in to your profile.
- In the professional profile section press on the name of the document you wish to update.
- In the window that appears tap the icon

- Select the option you want, take a picture or choose a file from your device .
- Enter the name of the document and a description (optional).
- Tap to finish uploading the document.
- Now the new document and its new information will be displayed on your professional profile.
Linking profile
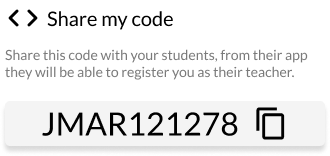
To link your profile with your students' profile and start your activities, you need to know and share your teacher code, or ask your students for their student code and add them directly.
Your teacher code: which you can share with your students so that they can add you as their new teacher.
- Enter to your profile
- Go to

- Tap the icon

- Now your code has been copied.
- Go to private messaging or the media you want to share your code and paste it.
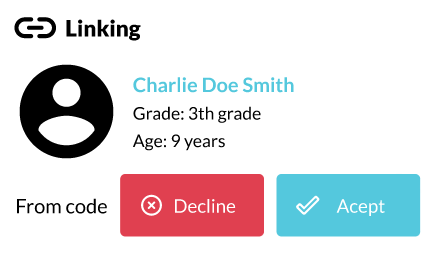
- Students should enter your code, and add you as an interventionist.
After that, you have to accept them as students . - Tap the notification or go to "Add a student".
- At the bottom you will see

- You will find your students' requests to join you.
- Tap
 to add them as students or
  if you don't want add them as students.
Content
You will be able to upload your own content, your own activities, the material that you need to carry out your work as an interventionist.
Upload my content (Activities)
As an interventionist, we know that you have prepared your materials for your classes, so it is important that you have them.
You can upload your PDFs, Word documents, images, etc. to share with your students, as well as store them in the application.
Upload PDF or any other file type
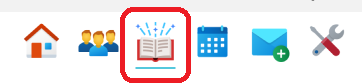
- From the top menu, go to

- Tap
 to enter the list of your own content.
 - In this screen you will see the folders you have created (How to create a folder).
- Tap
 located on the top right.
 - On the next screen, tap
 to select a PDF document.
 - This will open your file manager where you can select the file to upload. The document you want to upload should already be loaded on your device.
- Once you have selected the document, the 'Upload your material' screen should show the name of the document you have picked and the option to delete it and re-upload another document if it is not the correct one.
- You will need to fill in the name of the activity and a instructions.
- The icon
 confirms that the information has been entered.
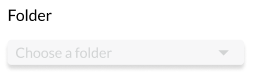
 - In the Folder bar
select the folder to which the file belongs.
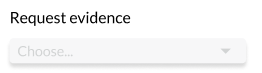
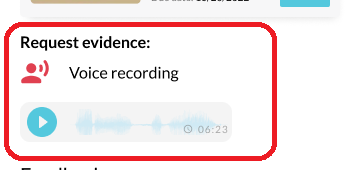
- In the Required evidence bar
you can choose between an audio recording or an uploaded document.
- Once the information is complete and correct, press to complete the upload and save your document.


Take a photo
- From the top menu, go to
- Press to enter the list of your own content.
- In this screen you will see the folders you have created (How to create a folder).
- Press located on the top right.
- On the next screen, press
 to open your camera.
 - Focus the activity as clearly as possible.
- Crop the image focusing only on what you want to share by dragging the crop lines.
- Press "Done" once it looks the way you need it to.
- You will return to the Upload Your Material screen and a thumbnail of the cropped image will be displayed, if you wish to add more images, press
 and repeat steps 6, 7 and 8.
 - When you have all the images you need, you will need to fill in the name of the activity and instructions.
- The icon confirms that the information has been entered.
- In the Folder bar
select the folder to which the file belongs. - In the Required evidence bar
you can choose between an audio recording or an uploaded document. - Once the information is complete and correct, tap to complete the upload and save your document.


Create folder
The ability to organise the material is important, which is why we created the folders.
Creating a folder for my content
- From the top menu, go to
- Tap to enter the list of your own content.
- In this screen you will see the folders you have created
- Tap
 located on the top left.
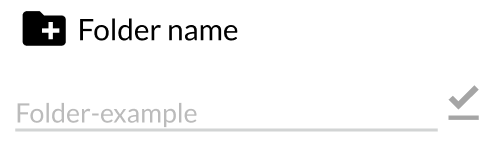
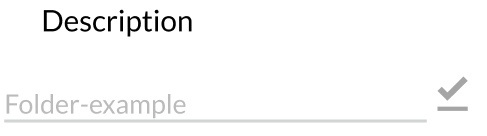
 - The "create folder" screen opens
- You have to fill
 and
and 
- The icon confirms that the information has been entered.
- Once the information is complete and correct, tap to create your folder.
Content by grade
The content by grade is a section that separates the content uploaded by interventionists by academic grade, which is shared.
Main functions
Letter Order allows you to add students, create custom groups, add students to these groups, schedule meetings, assign activities, create student or group notes, send notices, and more.
Add student
You will be able to add students to begin to support them in their learning process.
Add student
- From the top menu, go to

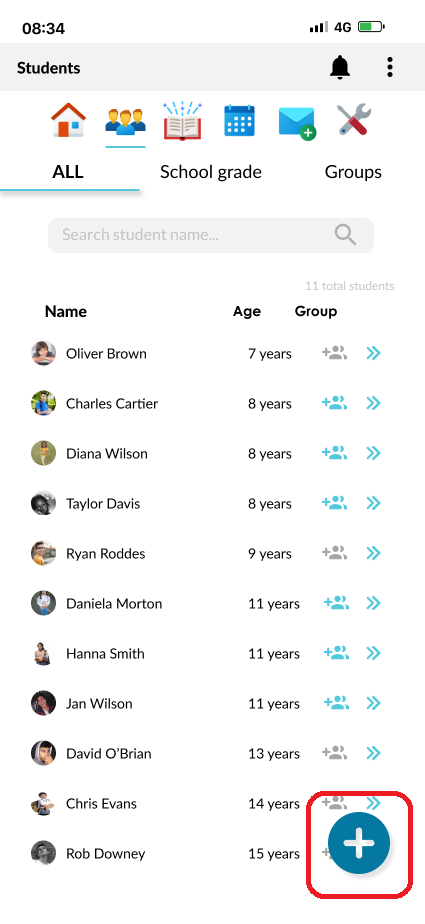
- The ALL option is the main option by default

- Tap located at the bottom right of the screen.
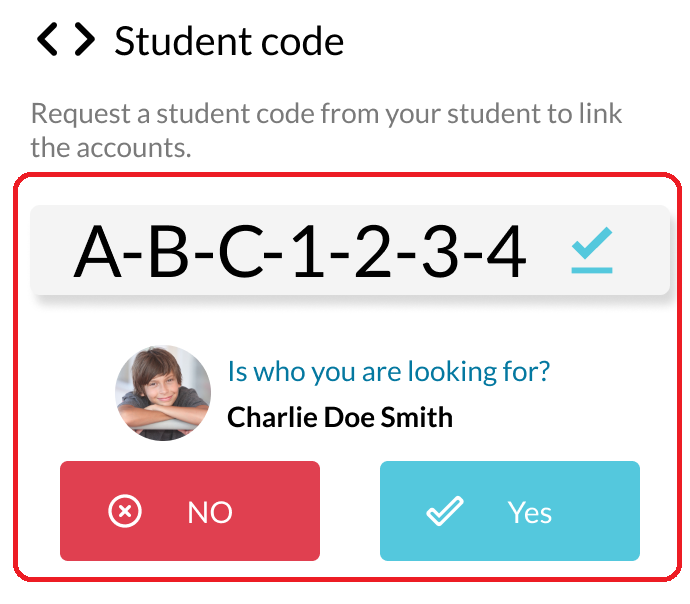
- Enter the code that has been shared with you by the student previously. (You must request the "Student Code" in advance to add your students.)
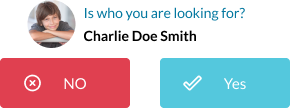
- The icon will be activated if the code is valid. and the name and age of the person to whom the code is assigned will then be on display

- If it's the right person you want to add tap
 and your students will receive a notification that they have been added to your class. But if is not the right person, tap
  , re-request the code from your student, and check that it is spelled correctly.

Create group
Creating a group will help you organize the information, tasks, and activities you want to assign to your students, as well as help you communicate with them.
Create a group
- From the top menu, go to
- Tap

- Tap icon located at the bottom right of the screen.
- Enter the name you want to give this group
 . It is best to use a name that will help you to identify the students you are dealing with.
 - Under
 tap the name of the students you want to add to this group, or leave blank if you do not have any students for this group yet.
 - The icon
 next to the student's name will become active when you select the student you want to add.
 - To save the group and its members: Tap
- The name of the group and the names of the students in the group will be displayed in summary mode in the pop-up screen. Tap
 to finish.

Your group has been created. It will appear in your Groups tab.
Assign to a group
If a new student has joined, you can add that student to a group if you wish.
You can add a student to a group from several places
- From the student's individual profile
- From the list of students on the ALL tab
- From the list of students in GRADE tab.
- From the list of students in GROUPS tab.
From individual profile
- Enter the individual profile of the student you want to group.

- Tap
 icon
icon
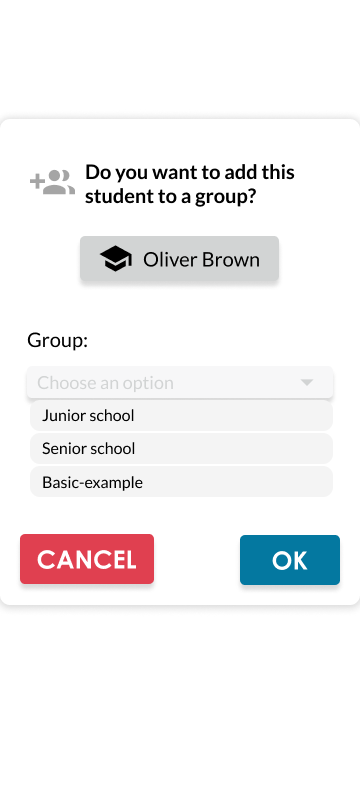
If the icon is displayed like this: it means that the student already belongs to a group. - If you tap , a pop-up screen will appear where you can select the group to which you want to assign the student.

- When you tap on the bar, you will have a list of group options.

- To finish adding the student: Tap


From all tab
- From the top menu, go to
- The ALL option is the main option by default
- Each student's individual profile will be on display.
- You should tap the icon
If the icon is displayed like this: it means that the student already belongs to a group. - If you tap , a pop-up screen will appear where you can select the group to which you want to assign the student.
- When you tap on the bar, you will have a list of group options.
- To finish adding the student: Tap
From school grade tab
- From the top menu, go to
- Tap SCHOOL GRADE tab bar

- Tap the desired group name. A group of options will be displayed

- Tap
 from the icons displayed.
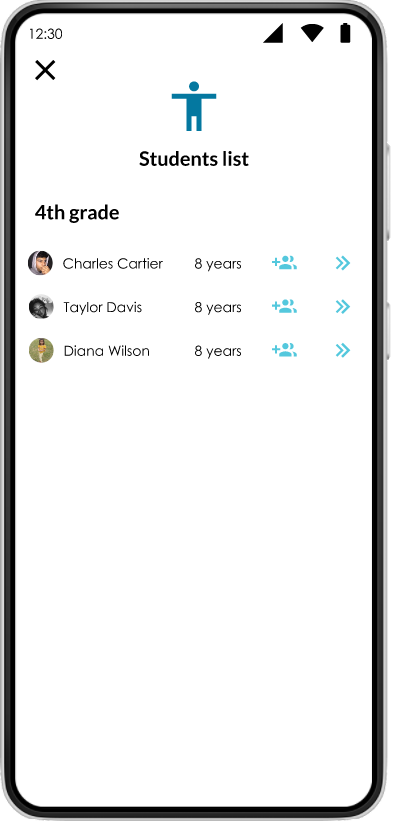
 - The students list screen will show you.

- Each student's individual profile will be on display. (If you want to go to the student's profile tap
 icon)
icon) - You should tap on the icon
If the icon is displayed like this: it means that the student already belongs to a group. - If you tap , a pop-up screen will appear where you can select the group to which you want to assign the student
- When you tap the bar, you will have a list of group options.
- To finish adding the student: tap


From groups tab
- From the top menu, go to
- Tap GROUPS tab bar
- Tap
 of the group you wish to view.

- Each student's individual profile will be on display. (If you want to go to the student's profile tap icon)
- You should tap the icon
If the icon is displayed like this: it means that the student already belongs to a group. - If you tap , a pop-up screen will appear where you can select the group to which you want to assign the student.
- When you tap the bar, you will have a list of group options.
- To finish adding the student: Tap

Activity assignment
Assigning activities consists of letting the learner know what they are expected to do, providing instructions, and defining the type of content they need to deliver.
- Once you have uploaded the activity you want to assign (to upload your activity, see: Upload my content). Go to Activities
- Tap
- Once inside, select the folder that contains the activity you want to assign.
- Tap the activity you want to assign
- Two options appear
 . Tap
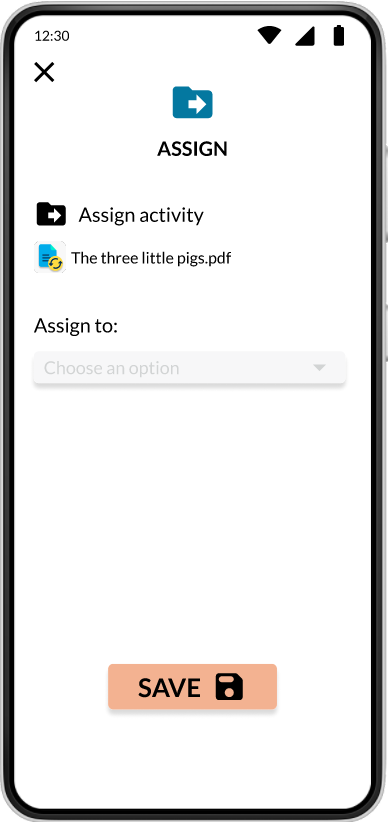
. Tap  icon.
icon. - On the pop-up screen, you will see the name of the activity you want to assign and the "Assign to" option.

- Tap the options bar and select the type of assignment you want to make: individual, group or grade.
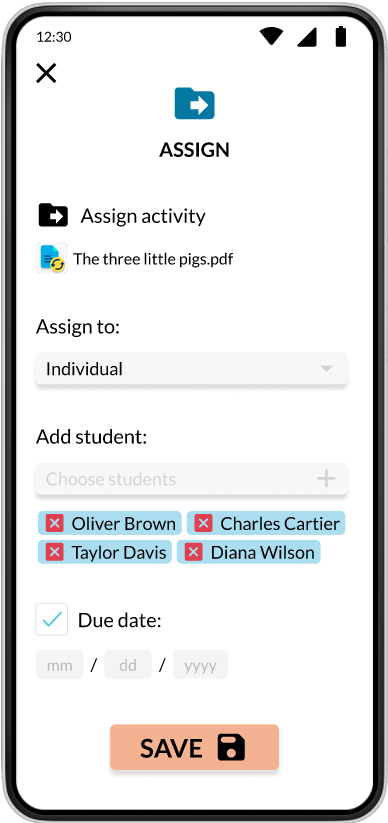
Individual
- The screen will change and the "Add Student" option will be added, tap

- On the pop-up screen you will see a list of students available for assignment . Tap
 next to the student name to add them to the activity assignment.
 - When you have selected all the students you want, tap to add them.
- You will see the students you have selected for the activity.

(If you want to remove any of them, just tap )
) - You will see the option to add a due date, if you want to activate it, tap

- Enter the date assigned for the submission of the Activity
 (activities will have a due date time of 23:59).
 - Tap to send the assignment with the entered data.
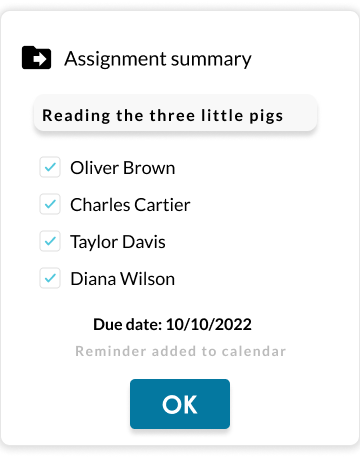
- A pop-up screen will open with a summary of the activity assignment, where you can see the name of the activity, the students who were assigned and sent the assignment notification and the deadline for submitting the activity.

(A reminder of the activity deadline will be added automatically). - Tap to finish
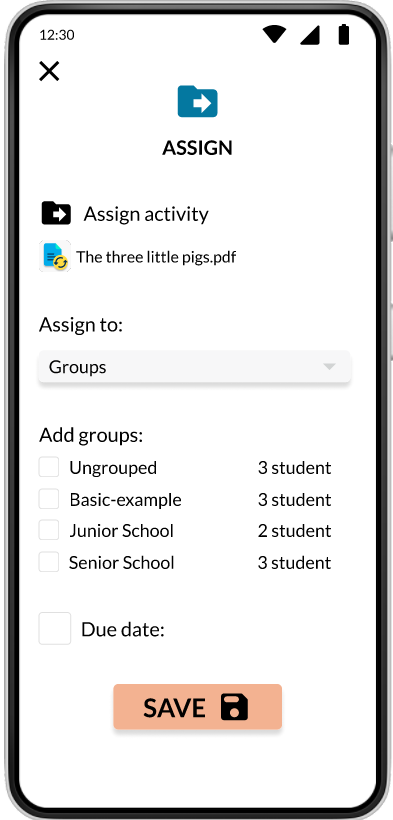
Group
- If you choose to assign by groups, the screen changes and adds the option to choose from the groups you created.

- Tap
 to add a group to the assignment
- You will see the option to add a due date, if you want to activate it, tap
- Enter the date assigned for the submission of the Activity (activities will have a due date time of 23:59).
- A pop-up screen will open with a summary of the activity assignment, where you can see the name of the activity, the group assigned and sent the assignment notification and the deadline for submitting the activity. (A reminder of the activity deadline will be added automatically).
- Tap to finish
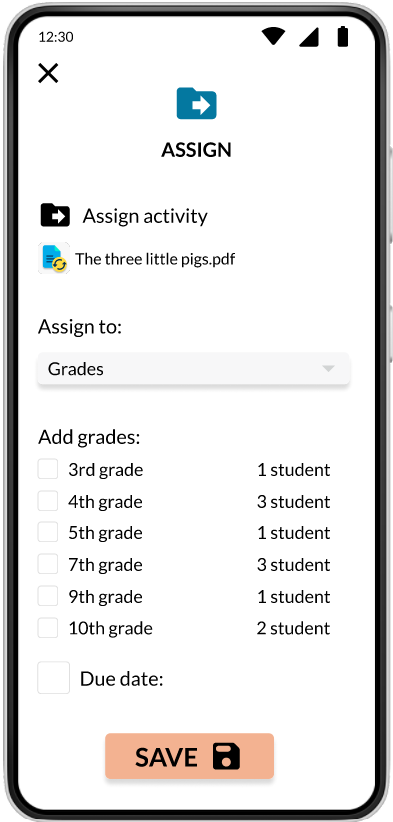
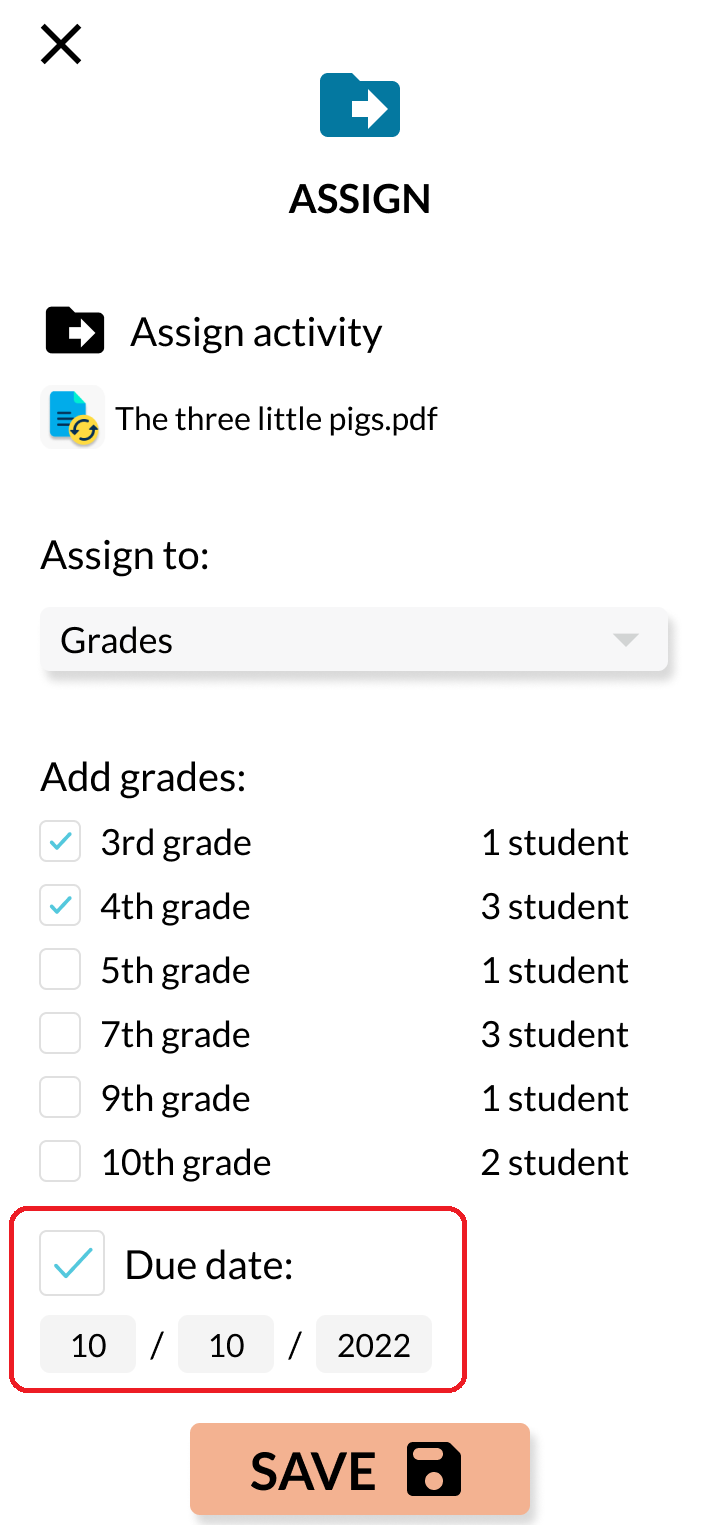
Grade
- If you choose to assign by grade, the screen changes and adds the option to choose from the grades.

- Tap to add a gradeto the assignment.
- You will see the option to add a due date, if you want to activate it, tap
- Enter the date assigned for the submission of the Activity (activities will have a due date time of 23:59).
- A pop-up screen will open with a summary of the activity assignment, where you can see the name of the activity, the grade assigned and sent the assignment notification and the deadline for submitting the activity. (A reminder of the activity deadline will be added automatically).
- Tap to finish
- If you choose to assign by grade, the screen changes and adds the option to choose from the grades.
- If you choose to assign by groups, the screen changes and adds the option to choose from the groups you created.
- The screen will change and the "Add Student" option will be added, tap


Group conversation
Initiate a group conversation with all students in the group. This feature applies to groups created or groups assigned by school grade.
To enter a conversation for a grade school group
- You must enter the student section
- Tap
- Tap the grade you want to send a group message to.
- Tap
 from the display.
 - The group message screen will appear.
- You can send your message by typing

- To send your message, tap
 icon
icon - Your students will receive a notification of the message and will be able to reply to you in the same conversation.
You can attach text, image or PDF files from your files by tapping the icon 
To enter a conversation for a custom group
- You must enter the student section
- Tap
- Tap the bar labeled
 with the group you want to message.
 - Some options and a list of student names will be displayed. Tap icon.
- The group message screen will appear.
- You can send your message by typing
- To send your message, tap icon
- Your students will receive a notification of the message and will be able to reply to you in the same conversation.


You can attach text, image or PDF files from your files by tapping the icon
Notes
Create notes to help you plan your content, make notes on student progress or what needs to be reinforced. You can also share these notes with students or parents.
This feature applies to invididual, groups created or school grade.
Individual notes
- Go to student profile
- Tap
 icon
icon - The list of notes created for this student will be displayed.
- Tap to create a new note.
- On the pop-up screen, type the name of the note.
- At
 start typing the note you want to add.
 - Tap to save the note you have typed.
- The note preview opens with options to share, edit, or delete the note.

Groupal notes
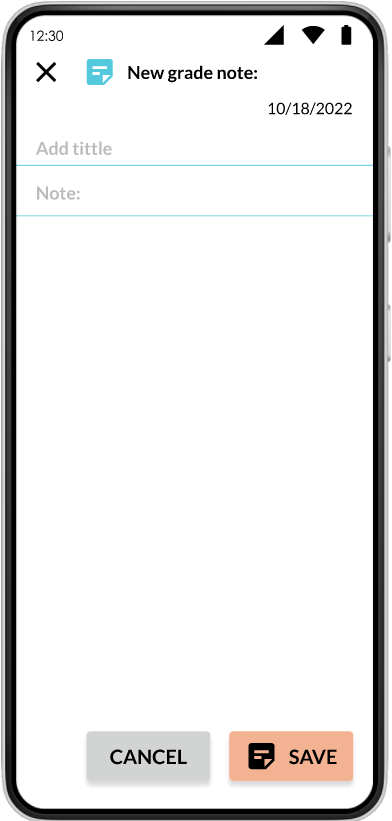
To create a note for school grade :
- You must enter the student section
- Tap
- Tap the grade you want to send a group notice to.
- Tap icon from the icons displayed.
- The note group screen will appear.

- Add a title for your note, and what you want to write.
- Finish your note by tapping


The notes are for you, except for the ones that you want to share with others.
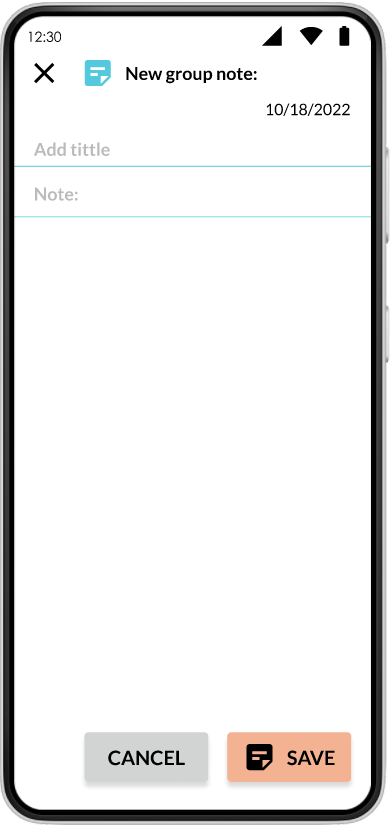
To create a note for custom group
- You must enter the student section
- Tap
- Tap the bar labeled with the group you want to create a note.
- In the following screen tap icon
- The new group note screen will appear.

- Add a title for your note, and what you want to write.
- Finish your note by tapping
The notes are for you, except for the ones that you want to share with others.
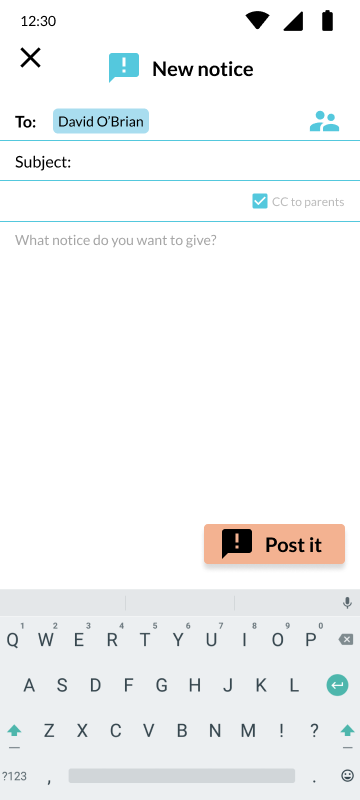
Notice
Individual notice
- Go to Student profile
- Tap
 icon
icon - The notice screen will appear. The name of the student you have previously selected will appear by default.

- Type the subject and the notice you want to announce to the group.
- To send your notice, tap

- You student will receive a notification of notice.

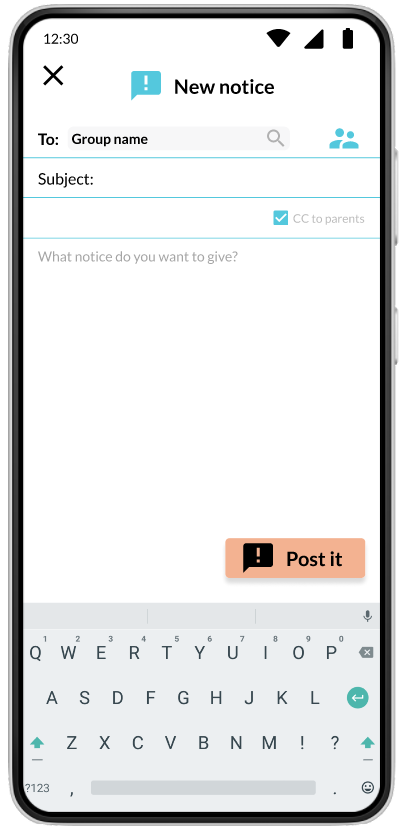
Groupal notice
Send notices to all the students in the group.
Notices can be reviews, congratulations, news, schedules, or any other information that does not require a response.
This feature applies to groups created or groups assigned by school grade.
To send a notice for custom group:
- You must enter the student section
- Tap
- Tap the group you want to send a notice to.
- Tap icon from the icons displayed.
- The notice screen will appear.

- Type the subject and the notice you want to announce to the group.
- To send your notice, tap
- Your students will receive a notification of notice.

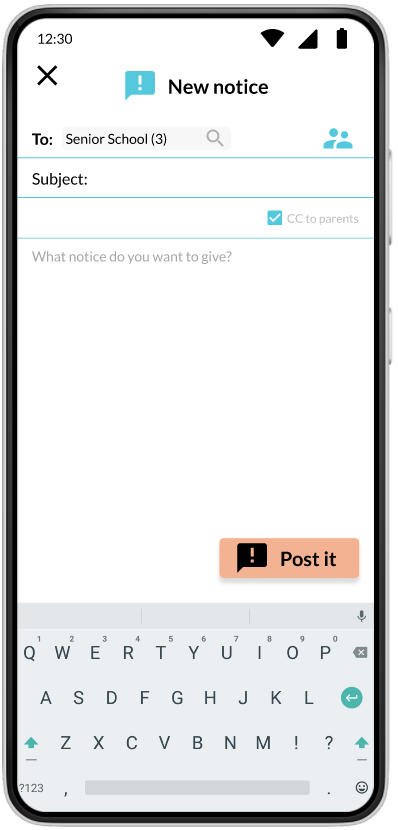
To send a notice for grade school group:
- You must enter the student section
- Tap
- Tap the bar labeled with the group you want to send a notice.
- In the following screen tap icon
- The notice screen will appear.

- Type the subject and the notice you want to announce to grade.
- To send your notice, tap
- Your students will receive a notification of notice.
Meeting
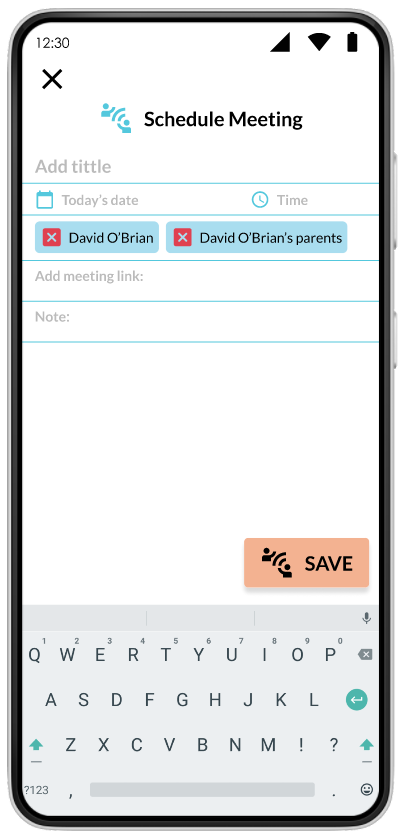
Individual meeting
- Go to Student profile
- Tap
 icon
icon - The meeting screen will appear. The name of the student and parents that you have previously selected will appear by default.

- If you want only a parents meeting tap icon next to the student's name, but If you want a student meeting, tap icon next student parent's name.
- Fill out the information below to schedule your meeting:
- Title
- Date
- Time,
- Link to connect to the meeting
- Note if needed.
- To finish scheduling your meeting, tap

- Your student or parents, or both will receive a notification about the meeting schedule.


Groupal meeting
Schedule a group meeting, send a notification to all students, and automatically add it to their calendars, just like yours.
This feature applies to groups created or groups assigned by school grade.
To send a notice for custom group:
- You must enter the student section
- Tap
- Tap the group you want to schedule a meeting for.
- Tap icon from the icons displayed.
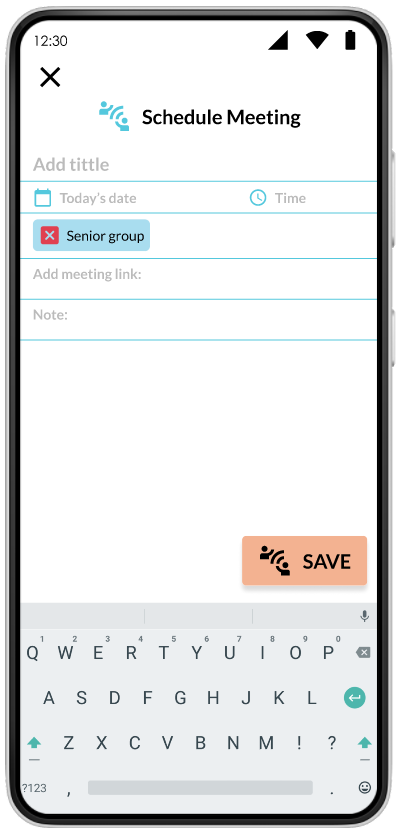
- The schedule meeting screen will appear.

- Fill out the information below to schedule your meeting:
- Title
- Date
- Time,
- Link to connect to the meeting
- Note if needed.
- To finish scheduling your meeting, tap
- Your students will receive a notification about the meeting schedule.
To send a notice for grade school group:
- You must enter the student section
- Tap
- Tap the bar labeled with the group you want to schedule.
- In the following screen press
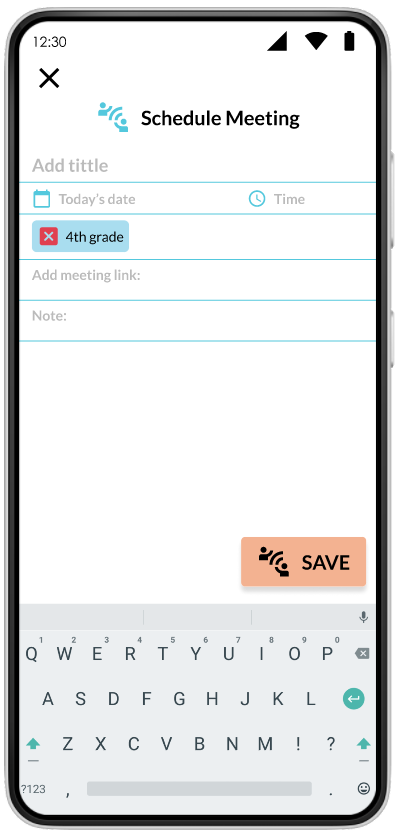
- The schedule meeting screen will appear.

- Fill out the information below to schedule your meeting:
- Title
- Date
- Time,
- Link to connect to the meeting
- Note if needed.
- To finish scheduling your meeting, tap
- Your students will receive a notification about the meeting schedule.
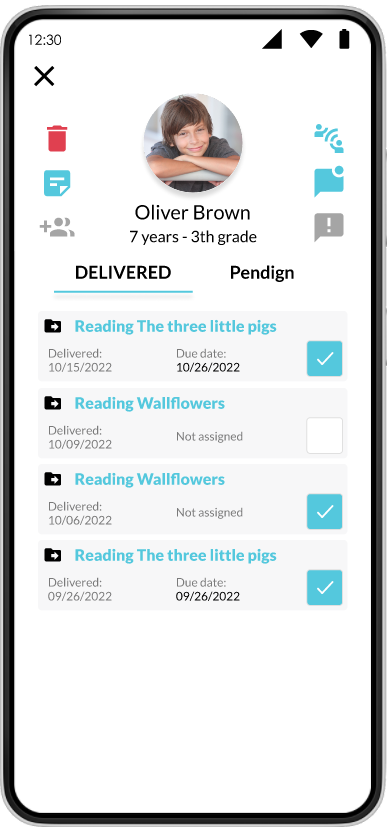
Student profile
The Student Profile allows you to have a separate view of each student, view individual options, and see a list of assigned, submitted, and pending activities that you can monitor.
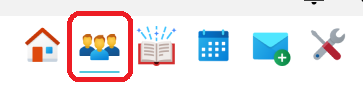
- Tap located in the top menu to go to students section.
-
To access the individual profile, tap the student name or
icon. -
On the pop-up screen you will see the options created for the individual student.

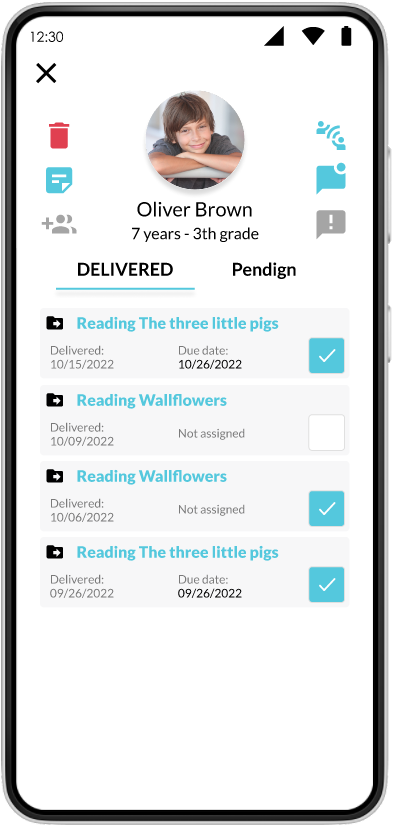
The tools available from there are:
- Delete a Student
- Create an individual note
- Add the student to a group
- Schedule a meeting
- Send a message
- Submitted or pending activities
Organization
You will be able to see how students are organised in your lists.
All students
To go to your student section tap on the icon ![]() located in the top menu.
located in the top menu.
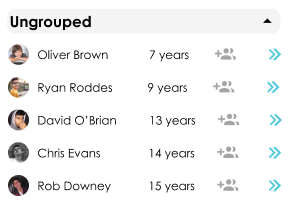
You will see 3 tabs where students are organized.
![]()
All
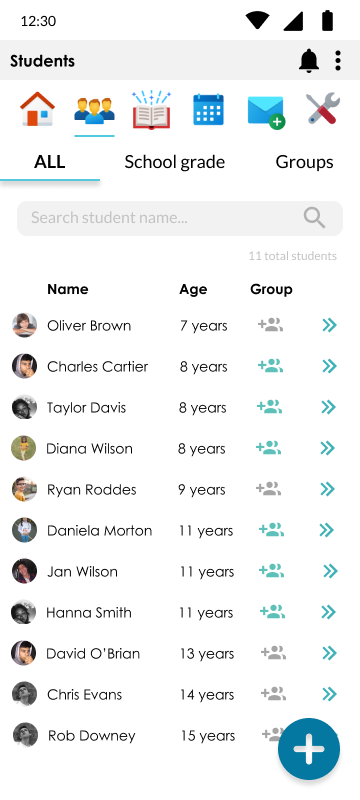
You will be able to find the list of the students who are already linked to you.
You can search for the students you need by name or surname in the upper bar 
Students are organized in a table by name, age, group (if they have a group assigned or if they are not grouped).
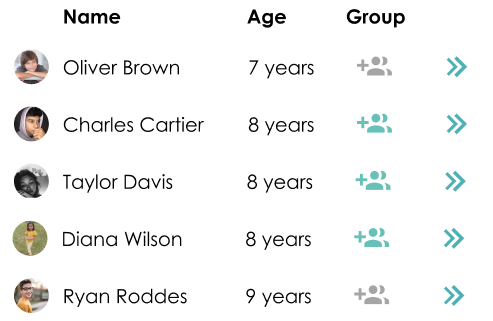
At the bottom you will find the button ![]() to add new students by code.
to add new students by code.
To access each student's individual profile, tap  icon
icon
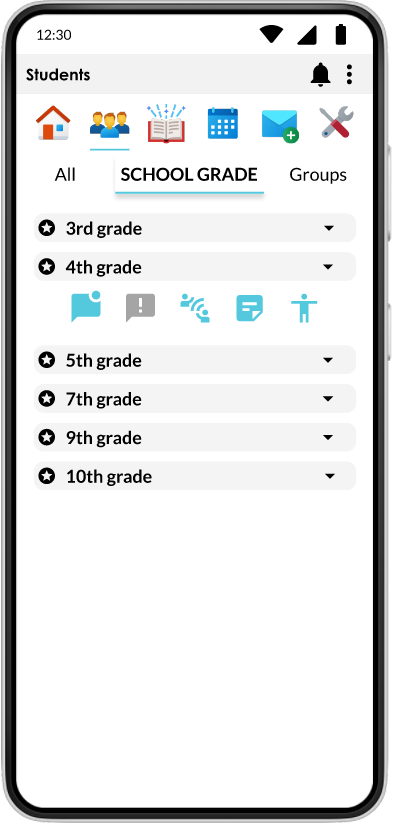
School grade
School grade
To go to your student section tap the icon ![]() located in the top menu.
located in the top menu.
- You have to tap

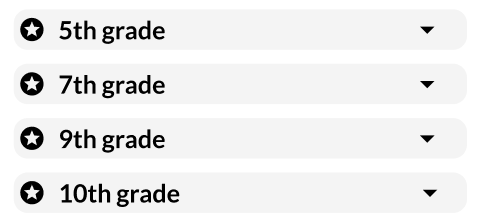
- Students are automatically organized by school grade in accordance with what has been added to the profile.

- Each grade group is a grouping of students.
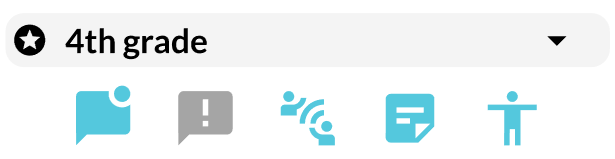
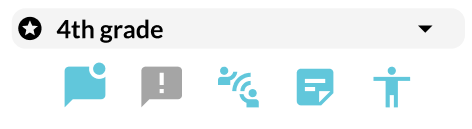
- A number of options for the group appear when you tap on the class.

- You can send a message to the entire class , send a notice , set up a meeting , create a grade note and see a list of the students who are in that grade.
Student list by grade:
- Tap
- Tap grade you want to display.
- Tap icon from the icons displayed.
- The students list screen will appear.

- If you want to go to the student's profile tap icon.
Groups
GROUPS
To go to your student section tap the icon ![]() located in the top menu.
located in the top menu.
You have to tap![]()
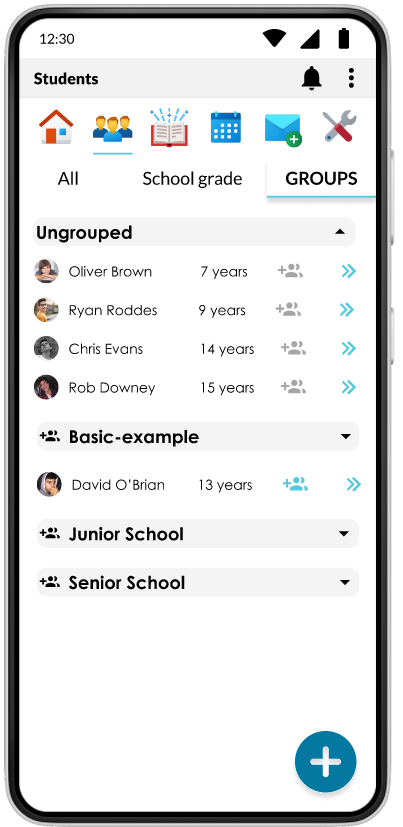
You will find custom groups that you can create to organize your students according to the needs that you set as a parameter.
Tap´the name of each group to see the options available for it. You can also edit or delete the group.
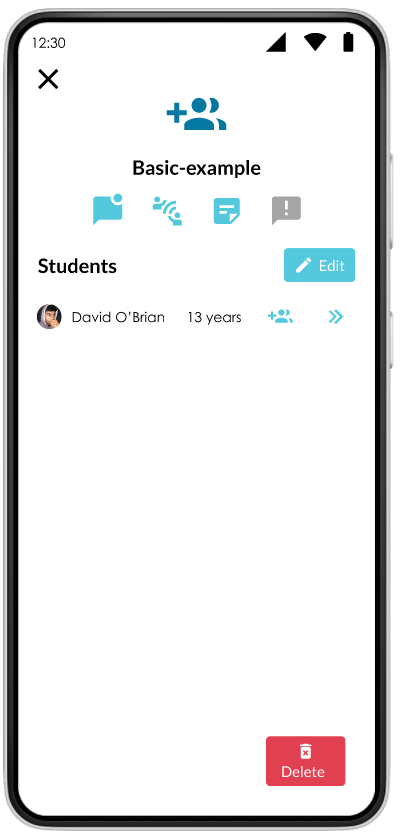
Student list by groups
- Tap
- Tap the icon next to the name of the group
- The list of students belonging to the group created will be displayed.
- Tap the group name and it will open a screen with more options for the selected group.

- If you want to go to the student's profile tap icon.
Quick start
The basic steps for using Letter Order are: create an account, add students, share my code, upload materials, assign materials, review activities.
Create account
- Open the app
- Tap
 user
user - Tap
- Fill in the information required to create the account.
- Add a certificate of education and a certificate of specialization as an interventionist, either as an image or PDF file.
- Tap

Once the account is created, you must log in with the email and account you have previously added.
Once logged in, you will be able to add a student.
Add student
To add students there are 2 options:
- Go to "my profile" by tapping on the top bar
- Tap

- Place the copy icon next to the interventionist code that you will share with your students.
 }
}

Once your students enter your code, their accounts will be linked and they can begin working.
The other way is:
- Ask the student you want to add for their student code.
- Once he/she gives it to you, you will need to enter the Student section.

- Tap on the add icon

- Enter the student's code and verify that the information is correct for the person you are adding.

- Touch "Yes" if it is correct and tap "No" if it is not and try again.
Upload material
To upload your work material
- Tap activities section

- Tap upload icon

- Choose the file or take a picture of the material and upload it. Fill in information such as name and description.
- Select a folder to sort the material and select the type of evidence required to complete the activity, such as voice recording or file submission.
- Tap save to upload it.

Assign activity
With the uploaded material, you can assign the activity
- Touch the activity you want to assign.
- Tap assign option

- Choose who you want to assign the activity to, either individually, in a group, or by grade level.
- You can set a deadline for the delivery of the activity or leave it open.

- Tap Save, and the activity is assigned and added to the calendar with the due date for both you and the student

Send feedback
Once the activities are returned for review, you will receive a notification.
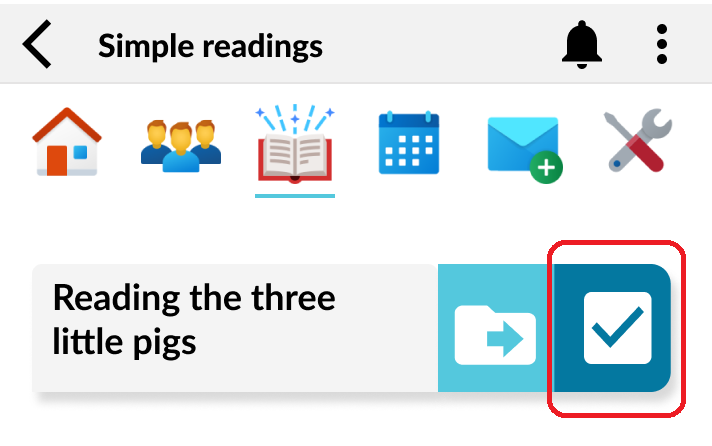
- Go to the activity you want to review
- Tap the review icon

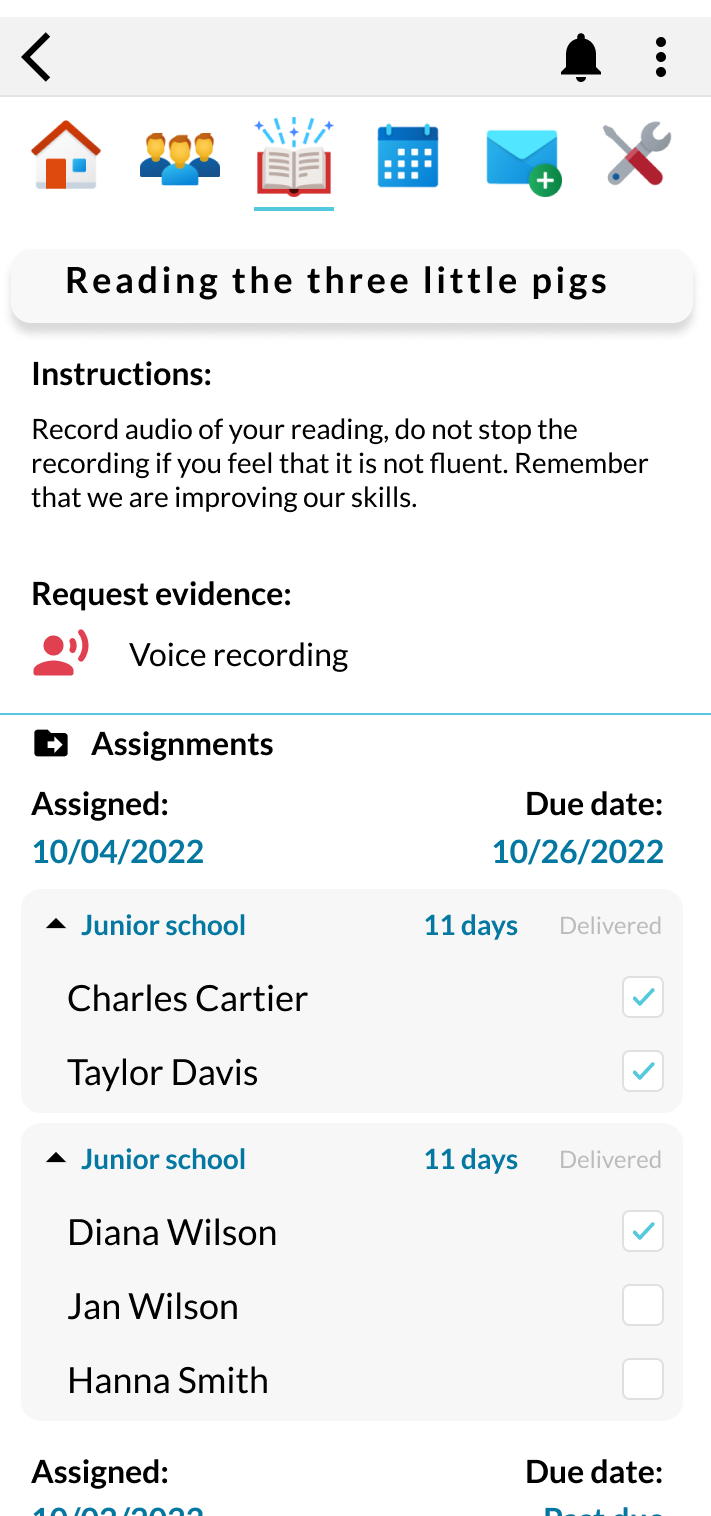
- You will see the activity information and the list of students who have been assigned the activity.

- Students who have already submitted the activity will look like this:

- Tap the icon
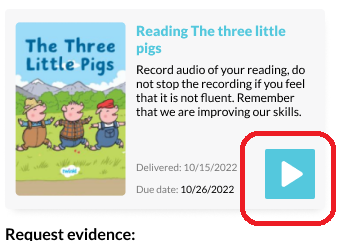
- Tap to view activity

- Tap to listen to the audio or view the attached file, as appropriate.

- Add your comment and send it to the student for feedback.


There are many more functions that you can use, read the prepared documentation. Good luck.