Main functions
Letter Order allows you to add students, create custom groups, add students to these groups, schedule meetings, assign activities, create student or group notes, send notices, and more.
- Add student
- Create group
- Assign to a group
- Activity assignment
- Group conversation
- Notes
- Notice
- Meeting
- Student profile
Add student
You will be able to add students to begin to support them in their learning process.
Add student
- From the top menu, go to

- The ALL option is the main option by default

- Tap
 located at the bottom right of the screen.
 - Enter the code that has been shared with you by the student previously. (You must request the "Student Code" in advance to add your students.)
- The icon will be activated if the code is valid.
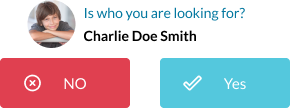
 and the name and age of the person to whom the code is assigned will then be on display

- If it's the right person you want to add tap
 and your students will receive a notification that they have been added to your class. But if is not the right person, tap
  , re-request the code from your student, and check that it is spelled correctly.


Create group
Creating a group will help you organize the information, tasks, and activities you want to assign to your students, as well as help you communicate with them.
Create a group
- From the top menu, go to
- Tap

- Tap icon located at the bottom right of the screen.
- Enter the name you want to give this group
 . It is best to use a name that will help you to identify the students you are dealing with.
 - Under
 tap the name of the students you want to add to this group, or leave blank if you do not have any students for this group yet.
 - The icon
 next to the student's name will become active when you select the student you want to add.
 - To save the group and its members: Tap

- The name of the group and the names of the students in the group will be displayed in summary mode in the pop-up screen. Tap
 to finish.

Your group has been created. It will appear in your Groups tab.
Assign to a group
If a new student has joined, you can add that student to a group if you wish.
You can add a student to a group from several places
- From the student's individual profile
- From the list of students on the ALL tab
- From the list of students in GRADE tab.
- From the list of students in GROUPS tab.
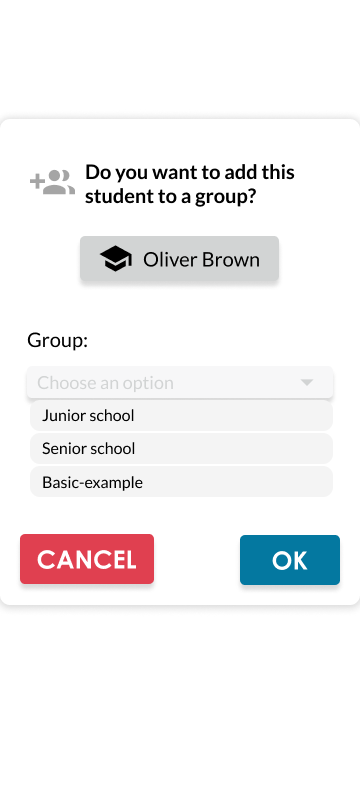
From individual profile
- Enter the individual profile of the student you want to group.

- Tap
 icon
icon
If the icon is displayed like this: it means that the student already belongs to a group. - If you tap , a pop-up screen will appear where you can select the group to which you want to assign the student.

- When you tap on the bar, you will have a list of group options.

- To finish adding the student: Tap


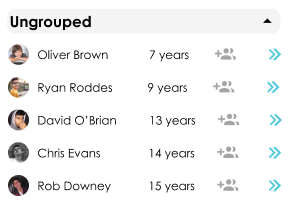
From all tab
- From the top menu, go to
- The ALL option is the main option by default
- Each student's individual profile will be on display.
- You should tap the icon
If the icon is displayed like this: it means that the student already belongs to a group. - If you tap , a pop-up screen will appear where you can select the group to which you want to assign the student.
- When you tap on the bar, you will have a list of group options.
- To finish adding the student: Tap
From school grade tab
- From the top menu, go to
- Tap SCHOOL GRADE tab bar

- Tap the desired group name. A group of options will be displayed

- Tap
 from the icons displayed.
 - The students list screen will show you.

- Each student's individual profile will be on display. (If you want to go to the student's profile tap
 icon)
icon) - You should tap on the icon
If the icon is displayed like this: it means that the student already belongs to a group. - If you tap , a pop-up screen will appear where you can select the group to which you want to assign the student
- When you tap the bar, you will have a list of group options.
- To finish adding the student: tap


From groups tab
- From the top menu, go to
- Tap GROUPS tab bar
- Tap
 of the group you wish to view.

- Each student's individual profile will be on display. (If you want to go to the student's profile tap icon)
- You should tap the icon
If the icon is displayed like this: it means that the student already belongs to a group. - If you tap , a pop-up screen will appear where you can select the group to which you want to assign the student.
- When you tap the bar, you will have a list of group options.
- To finish adding the student: Tap

Activity assignment
Assigning activities consists of letting the learner know what they are expected to do, providing instructions, and defining the type of content they need to deliver.
- Once you have uploaded the activity you want to assign (to upload your activity, see: Upload my content). Go to Activities

- Tap

- Once inside, select the folder that contains the activity you want to assign.
- Tap the activity you want to assign
- Two options appear
 . Tap
. Tap  icon.
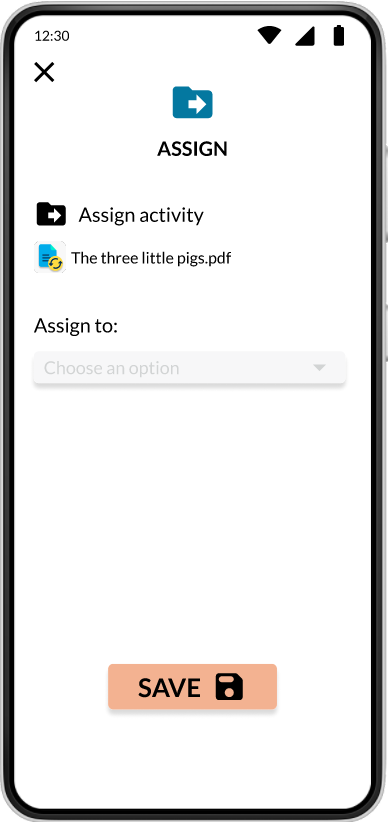
icon. - On the pop-up screen, you will see the name of the activity you want to assign and the "Assign to" option.

- Tap the options bar and select the type of assignment you want to make: individual, group or grade.
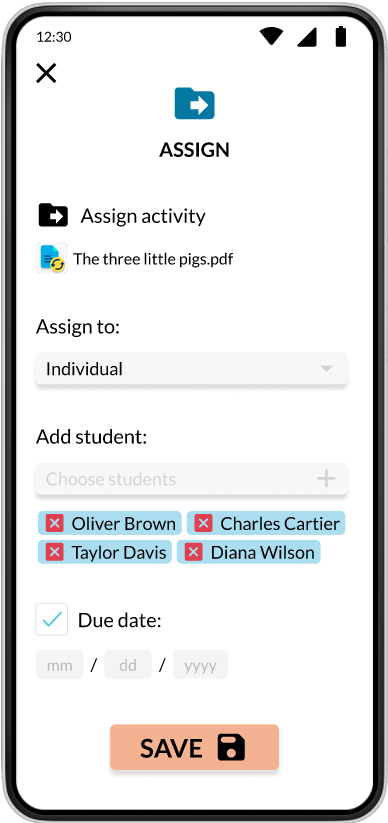
Individual
- The screen will change and the "Add Student" option will be added, tap

- On the pop-up screen you will see a list of students available for assignment . Tap
 next to the student name to add them to the activity assignment.
 - When you have selected all the students you want, tap to add them.
- You will see the students you have selected for the activity.

(If you want to remove any of them, just tap )
) - You will see the option to add a due date, if you want to activate it, tap

- Enter the date assigned for the submission of the Activity
 (activities will have a due date time of 23:59).
 - Tap to send the assignment with the entered data.
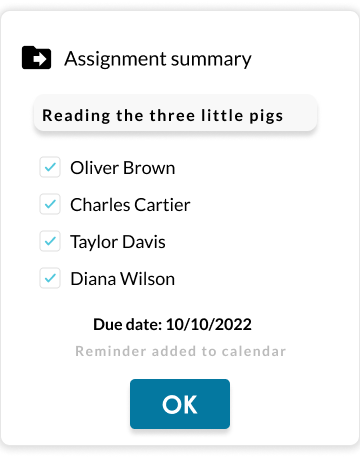
- A pop-up screen will open with a summary of the activity assignment, where you can see the name of the activity, the students who were assigned and sent the assignment notification and the deadline for submitting the activity.

(A reminder of the activity deadline will be added automatically). - Tap to finish
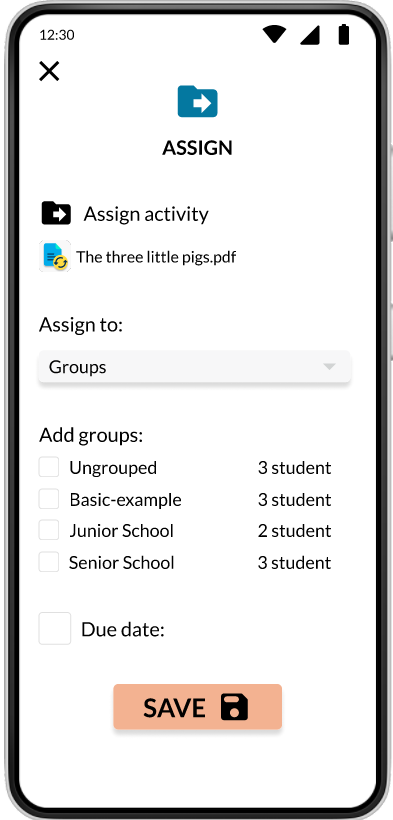
Group
- If you choose to assign by groups, the screen changes and adds the option to choose from the groups you created.

- Tap
 to add a group to the assignment
- You will see the option to add a due date, if you want to activate it, tap
- Enter the date assigned for the submission of the Activity (activities will have a due date time of 23:59).
- A pop-up screen will open with a summary of the activity assignment, where you can see the name of the activity, the group assigned and sent the assignment notification and the deadline for submitting the activity. (A reminder of the activity deadline will be added automatically).
- Tap to finish
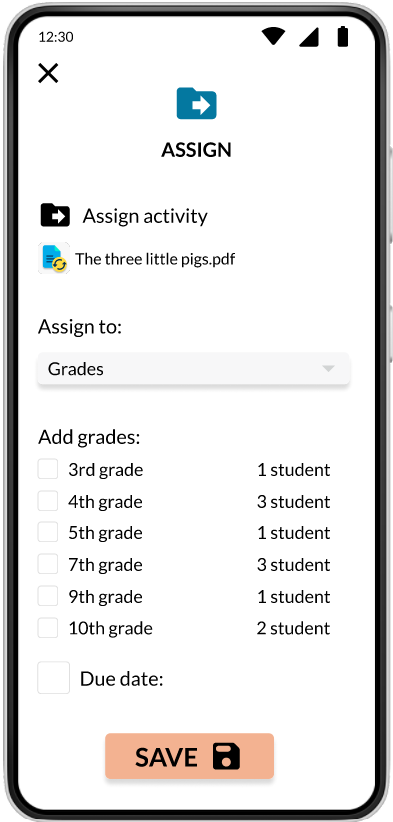
Grade
- If you choose to assign by grade, the screen changes and adds the option to choose from the grades.

- Tap to add a gradeto the assignment.
- You will see the option to add a due date, if you want to activate it, tap
- Enter the date assigned for the submission of the Activity (activities will have a due date time of 23:59).
- A pop-up screen will open with a summary of the activity assignment, where you can see the name of the activity, the grade assigned and sent the assignment notification and the deadline for submitting the activity. (A reminder of the activity deadline will be added automatically).
- Tap to finish
- If you choose to assign by grade, the screen changes and adds the option to choose from the grades.
- If you choose to assign by groups, the screen changes and adds the option to choose from the groups you created.
- The screen will change and the "Add Student" option will be added, tap


Group conversation
Initiate a group conversation with all students in the group. This feature applies to groups created or groups assigned by school grade.
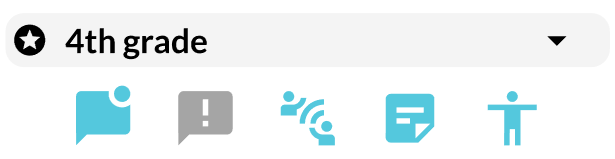
To enter a conversation for a grade school group
- You must enter the student section
- Tap
- Tap the grade you want to send a group message to.
- Tap
 from the display.
 - The group message screen will appear.
- You can send your message by typing

- To send your message, tap
 icon
icon - Your students will receive a notification of the message and will be able to reply to you in the same conversation.
You can attach text, image or PDF files from your files by tapping the icon 
To enter a conversation for a custom group
- You must enter the student section
- Tap
- Tap the bar labeled
 with the group you want to message.
 - Some options and a list of student names will be displayed. Tap icon.
- The group message screen will appear.
- You can send your message by typing
- To send your message, tap icon
- Your students will receive a notification of the message and will be able to reply to you in the same conversation.


You can attach text, image or PDF files from your files by tapping the icon
Notes
Create notes to help you plan your content, make notes on student progress or what needs to be reinforced. You can also share these notes with students or parents.
This feature applies to invididual, groups created or school grade.
Individual notes
- Go to student profile
- Tap
 icon
icon - The list of notes created for this student will be displayed.
- Tap to create a new note.
- On the pop-up screen, type the name of the note.
- At
 start typing the note you want to add.
 - Tap to save the note you have typed.
- The note preview opens with options to share, edit, or delete the note.

Groupal notes
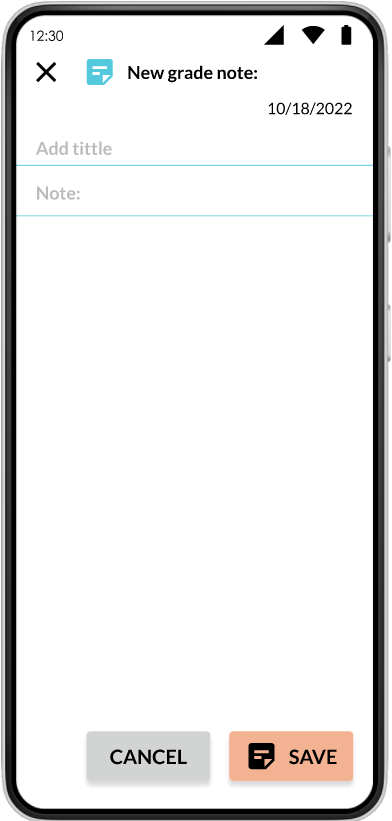
To create a note for school grade :
- You must enter the student section
- Tap
- Tap the grade you want to send a group notice to.
- Tap icon from the icons displayed.
- The note group screen will appear.

- Add a title for your note, and what you want to write.
- Finish your note by tapping


The notes are for you, except for the ones that you want to share with others.
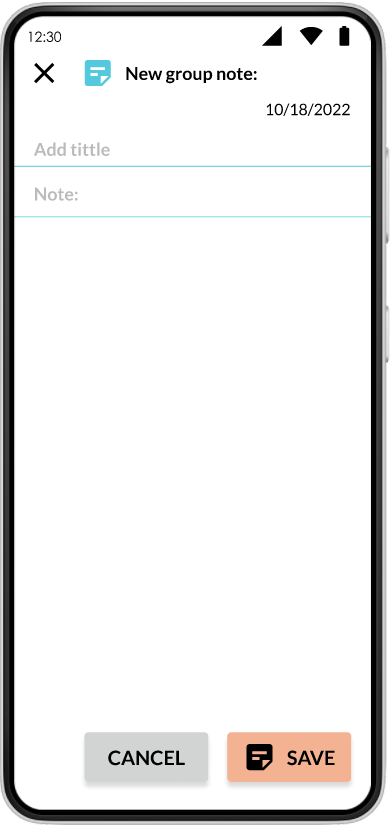
To create a note for custom group
- You must enter the student section
- Tap
- Tap the bar labeled with the group you want to create a note.
- In the following screen tap icon
- The new group note screen will appear.

- Add a title for your note, and what you want to write.
- Finish your note by tapping
The notes are for you, except for the ones that you want to share with others.
Notice
Individual notice
- Go to Student profile
- Tap
 icon
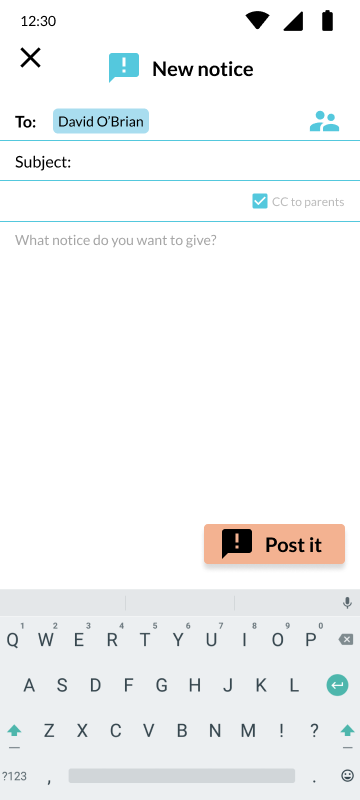
icon - The notice screen will appear. The name of the student you have previously selected will appear by default.

- Type the subject and the notice you want to announce to the group.
- To send your notice, tap

- You student will receive a notification of notice.

Groupal notice
Send notices to all the students in the group.
Notices can be reviews, congratulations, news, schedules, or any other information that does not require a response.
This feature applies to groups created or groups assigned by school grade.
To send a notice for custom group:
- You must enter the student section
- Tap
- Tap the group you want to send a notice to.
- Tap icon from the icons displayed.
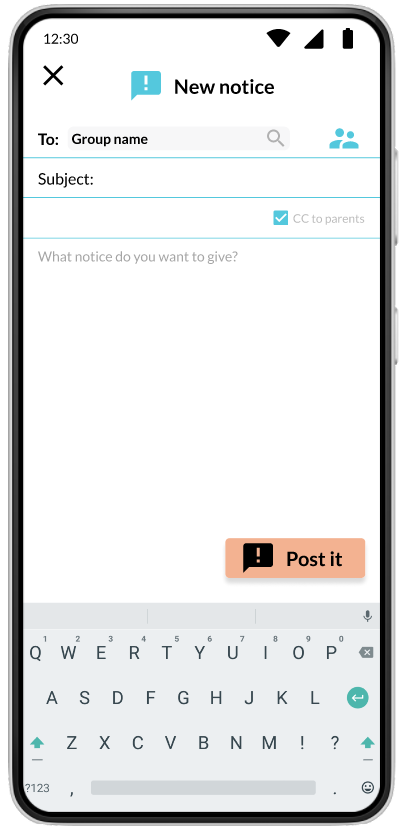
- The notice screen will appear.

- Type the subject and the notice you want to announce to the group.
- To send your notice, tap
- Your students will receive a notification of notice.

To send a notice for grade school group:
- You must enter the student section
- Tap
- Tap the bar labeled with the group you want to send a notice.
- In the following screen tap icon
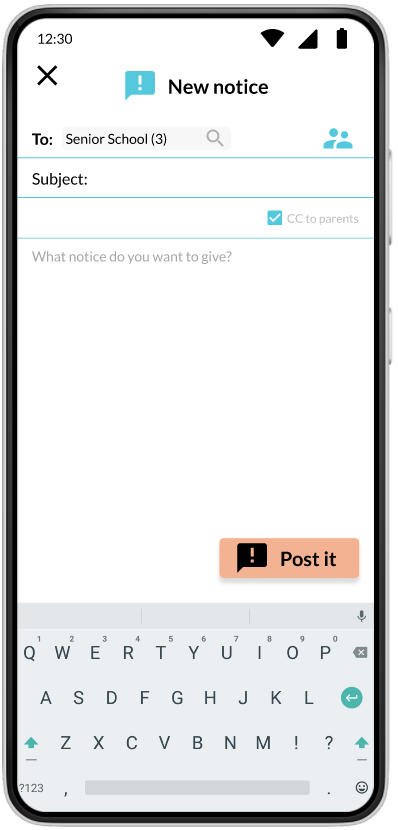
- The notice screen will appear.

- Type the subject and the notice you want to announce to grade.
- To send your notice, tap
- Your students will receive a notification of notice.
Meeting
Individual meeting
- Go to Student profile
- Tap
 icon
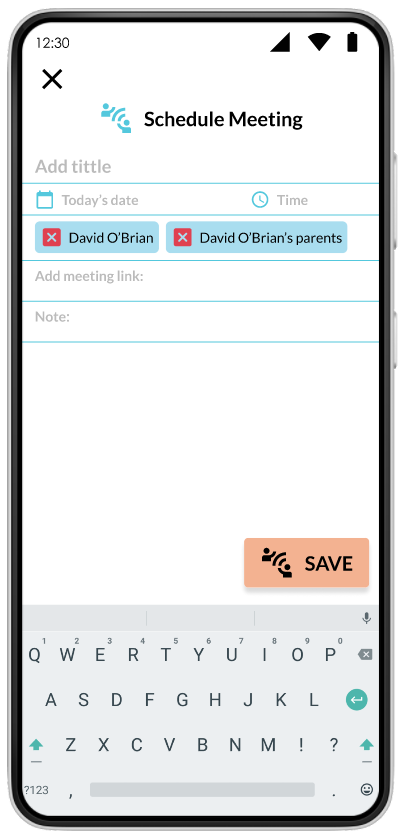
icon - The meeting screen will appear. The name of the student and parents that you have previously selected will appear by default.

- If you want only a parents meeting tap icon next to the student's name, but If you want a student meeting, tap icon next student parent's name.
- Fill out the information below to schedule your meeting:
- Title
- Date
- Time,
- Link to connect to the meeting
- Note if needed.
- To finish scheduling your meeting, tap

- Your student or parents, or both will receive a notification about the meeting schedule.


Groupal meeting
Schedule a group meeting, send a notification to all students, and automatically add it to their calendars, just like yours.
This feature applies to groups created or groups assigned by school grade.
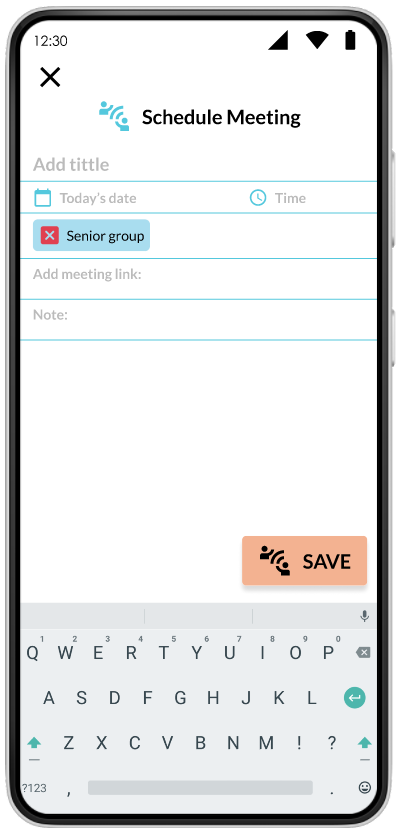
To send a notice for custom group:
- You must enter the student section
- Tap
- Tap the group you want to schedule a meeting for.
- Tap icon from the icons displayed.
- The schedule meeting screen will appear.

- Fill out the information below to schedule your meeting:
- Title
- Date
- Time,
- Link to connect to the meeting
- Note if needed.
- To finish scheduling your meeting, tap
- Your students will receive a notification about the meeting schedule.
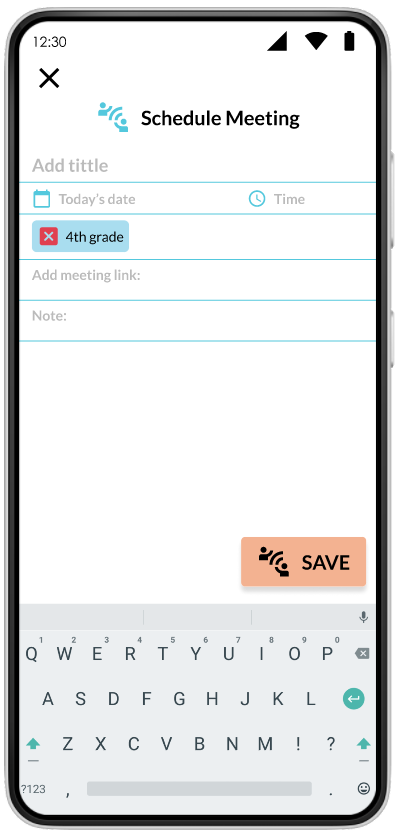
To send a notice for grade school group:
- You must enter the student section
- Tap
- Tap the bar labeled with the group you want to schedule.
- In the following screen press
- The schedule meeting screen will appear.

- Fill out the information below to schedule your meeting:
- Title
- Date
- Time,
- Link to connect to the meeting
- Note if needed.
- To finish scheduling your meeting, tap
- Your students will receive a notification about the meeting schedule.
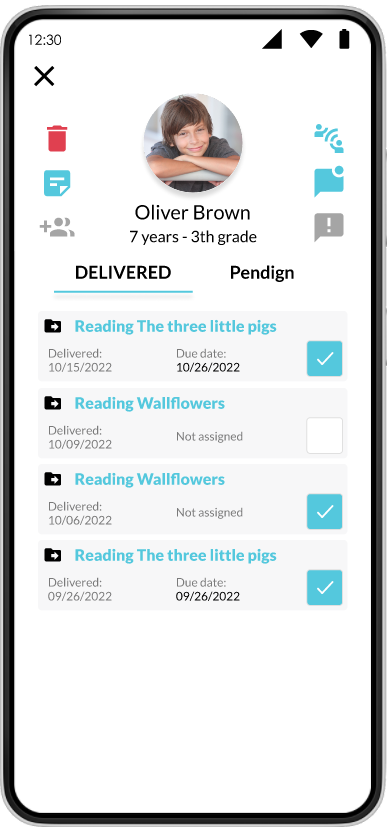
Student profile
The Student Profile allows you to have a separate view of each student, view individual options, and see a list of assigned, submitted, and pending activities that you can monitor.
- Tap located in the top menu to go to students section.
-
To access the individual profile, tap the student name or
icon. -
On the pop-up screen you will see the options created for the individual student.

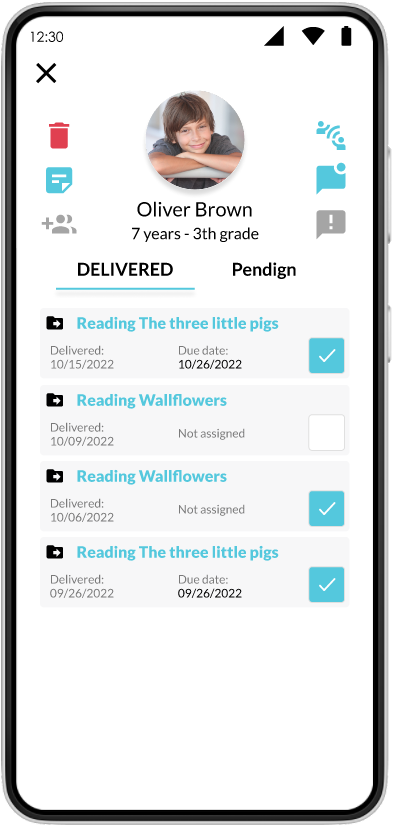
The tools available from there are:
- Delete a Student
- Create an individual note
- Add the student to a group
- Schedule a meeting
- Send a message
- Submitted or pending activities